
Restoration of Mathias Thir violin, 1778
Mathias Thir was a Viennese maker in the 18th Century. This violin came to me for restoration through a fine violin shop in San Rafael, CA called Dolce Violins, where violins, violas, and cellos are bought and sold.

This violin had many cracks in the top, especially next to the f-holes. The varnish was heavily worn, damaged, and dirty. To properly repair this kind of wear, and to restore the violin to a condition of playability and stability, the cracks needed to be cleaned, glued, and then reinforced on the inside of the instrument. Then, the varnish needed to be cleaned and restored in order to cover and protect the delicate wood beneath. Lastly, once all the repairs were complete, an excellent set-up (the bridge, soundpost, pegs, fingerboard and strings) ensured that the violin would sound its best.

The violin before restoration. Varnish is worn and dirty. Cracks are open and unfixed.

Note the large gap at the seam where the ribs and top meet. It had been glued so many times without ever properly being cleaned and re-fitted that it was a mess of old glue and wood that couldn’t meet for a proper glueing joint. Note that the rib is completely bare of varnish, from the players’ hands rubbing over centuries of playing. The lack of varnish is a dangerous, and must be fixed to preserve the wood.
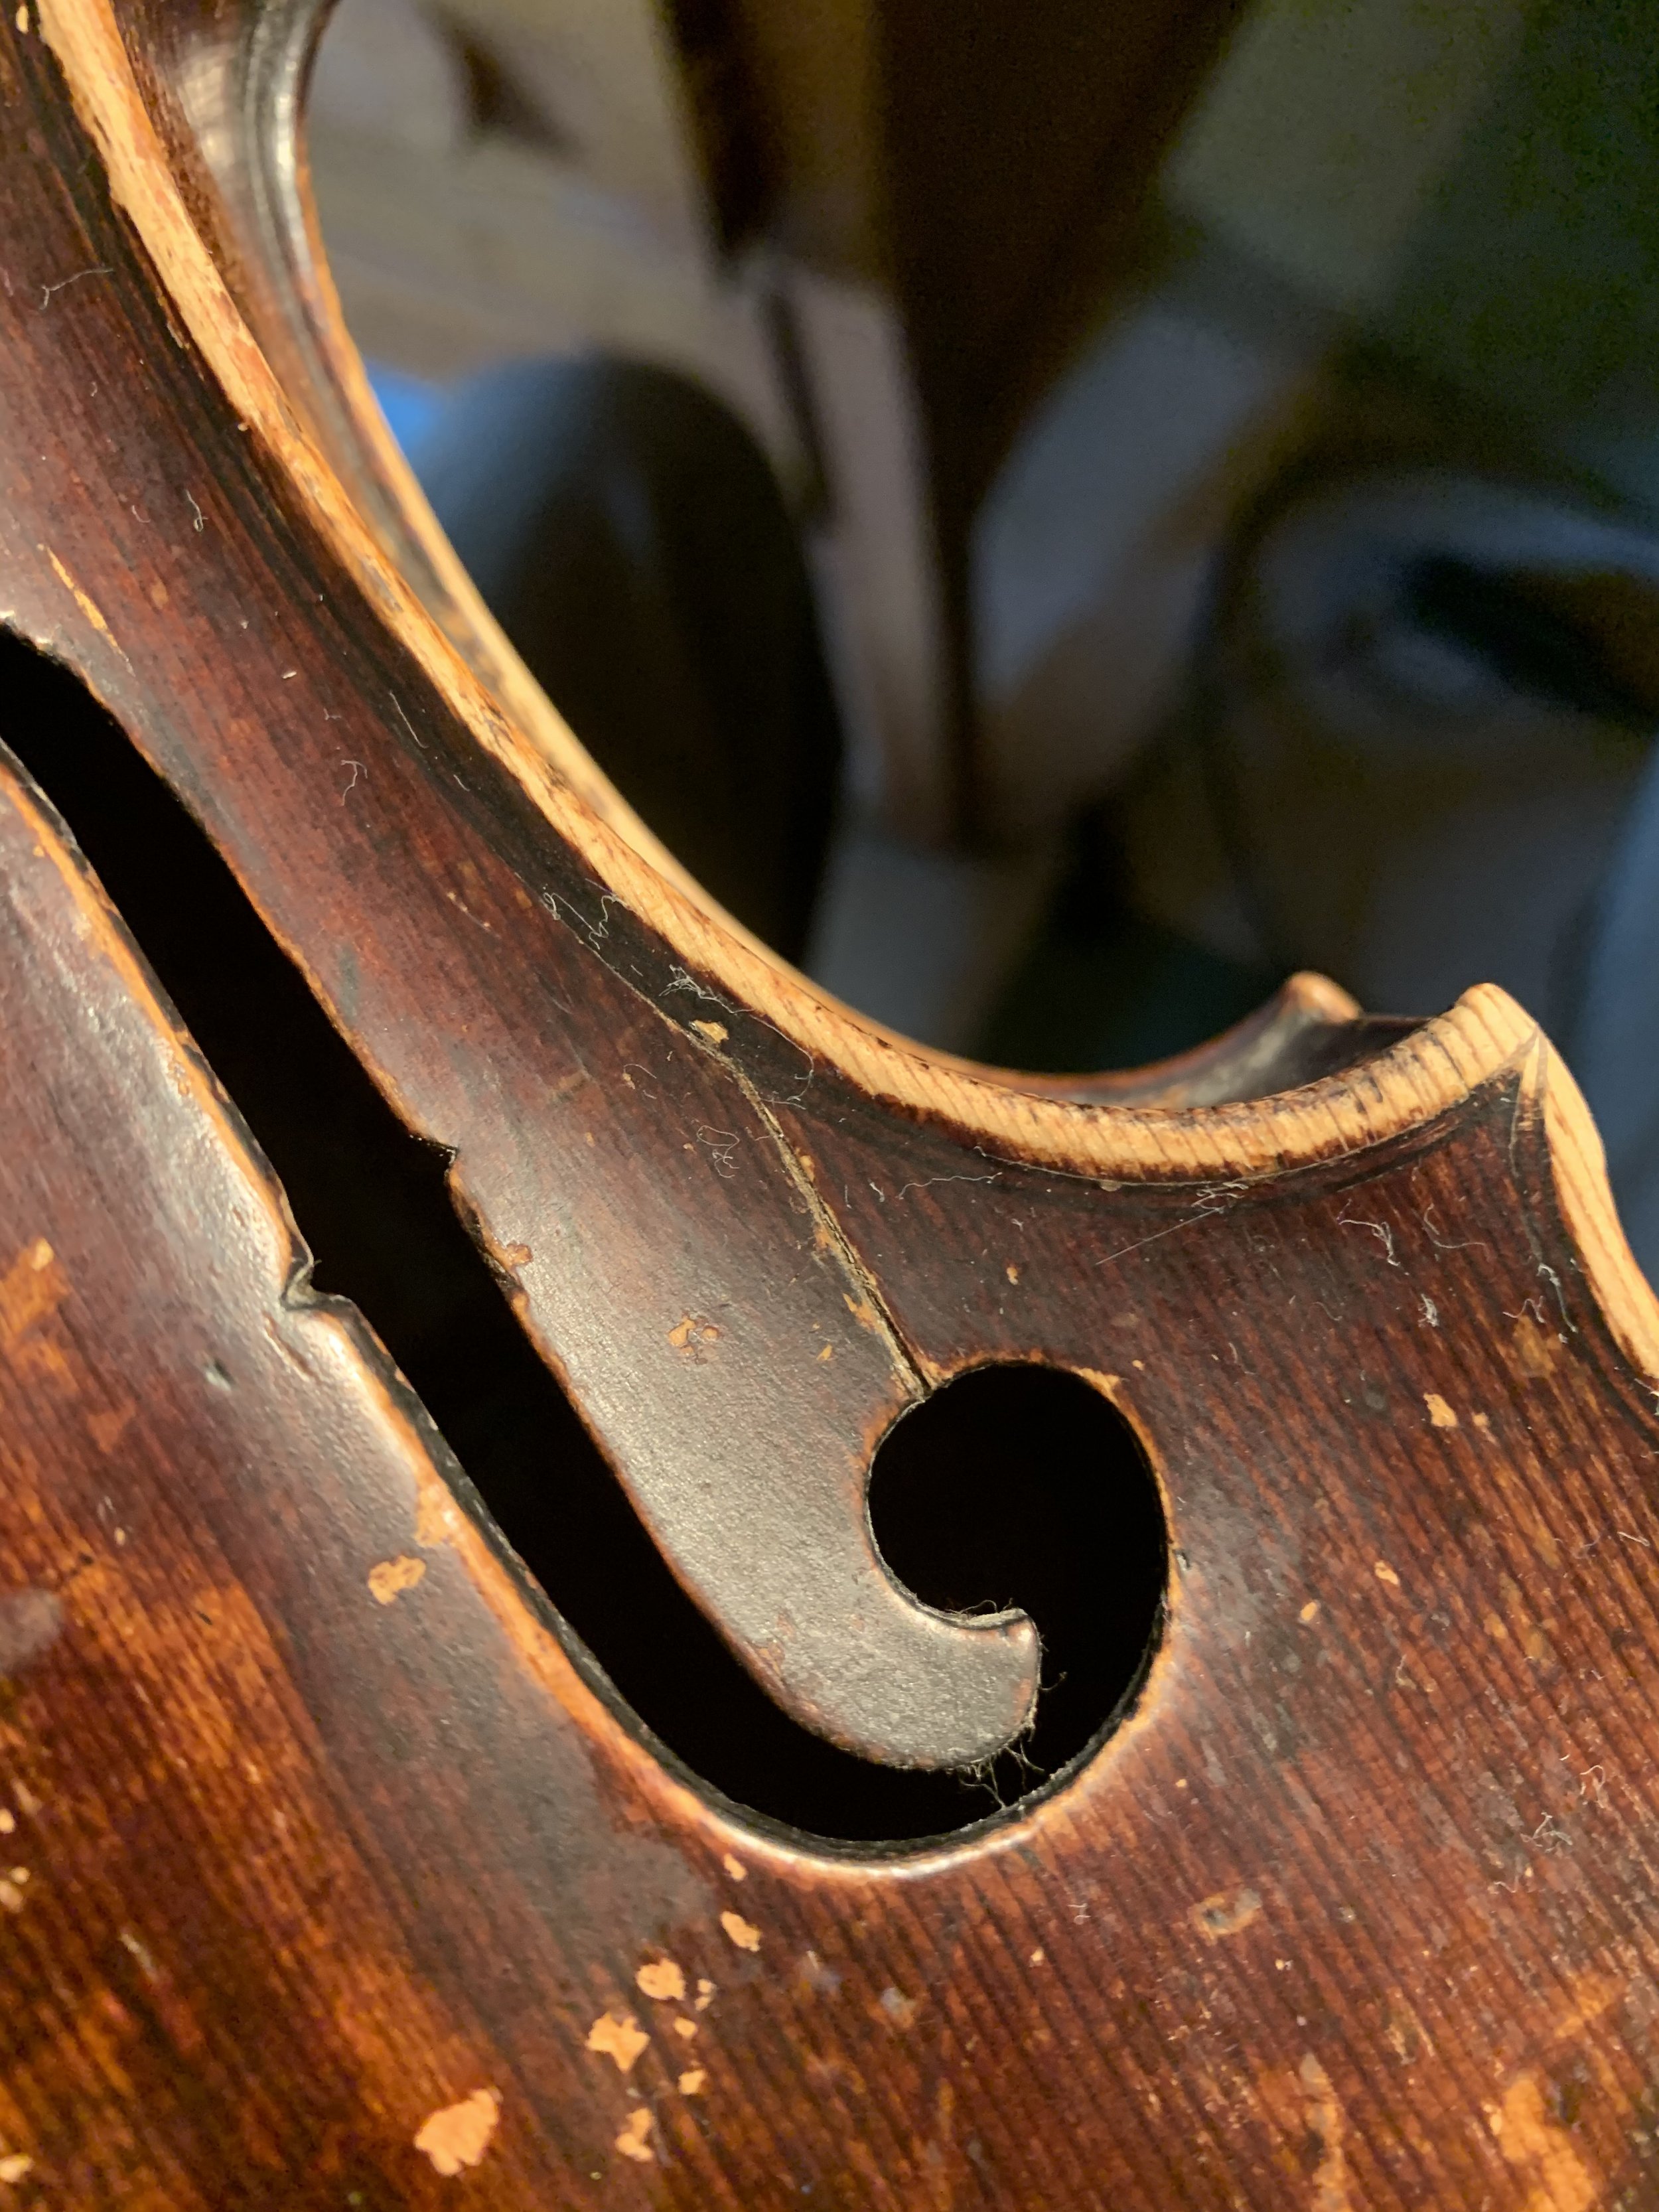
This picture shows one of the open cracks in the “wing” of the top, next to the f-hole.
The first step in restoring an old violin like this is to carefully clean the varnish. It is very important to preserve the varnish, not to strip it away, but to remove the built-up layers of dirt and grime. This process takes hours. Once all the dirt is removed, often all that is left at certain places on a very old instrument like this is bare wood, which will later need to be carefully and circumspectly sealed with new varnish to protect it. I make my own varnish according to recipes passed down for hundreds of years, using natural ingredients like resins, oils, and solvents such as alcohol and turpentine.
After cleaning, the cracks can be washed out, and then glued using a variety of clamps.

This picture shows the violin with clamps to glue the wing cracks.
Once the cracks are glued, they must be reinforced to prevent them cracking again. Reinforcements are fit on the inside of the instrument. “Cleats” are like little wooden band-aids, fit perfectly to the contours of the original wood, and glued in place to permanently stabilize the cracks. “Patches” are actually set into the wood by first removing the original, broken wood and then replacing that wood with new un-broken and strong wood to permanently hold the crack and keep it stable from breaking again.
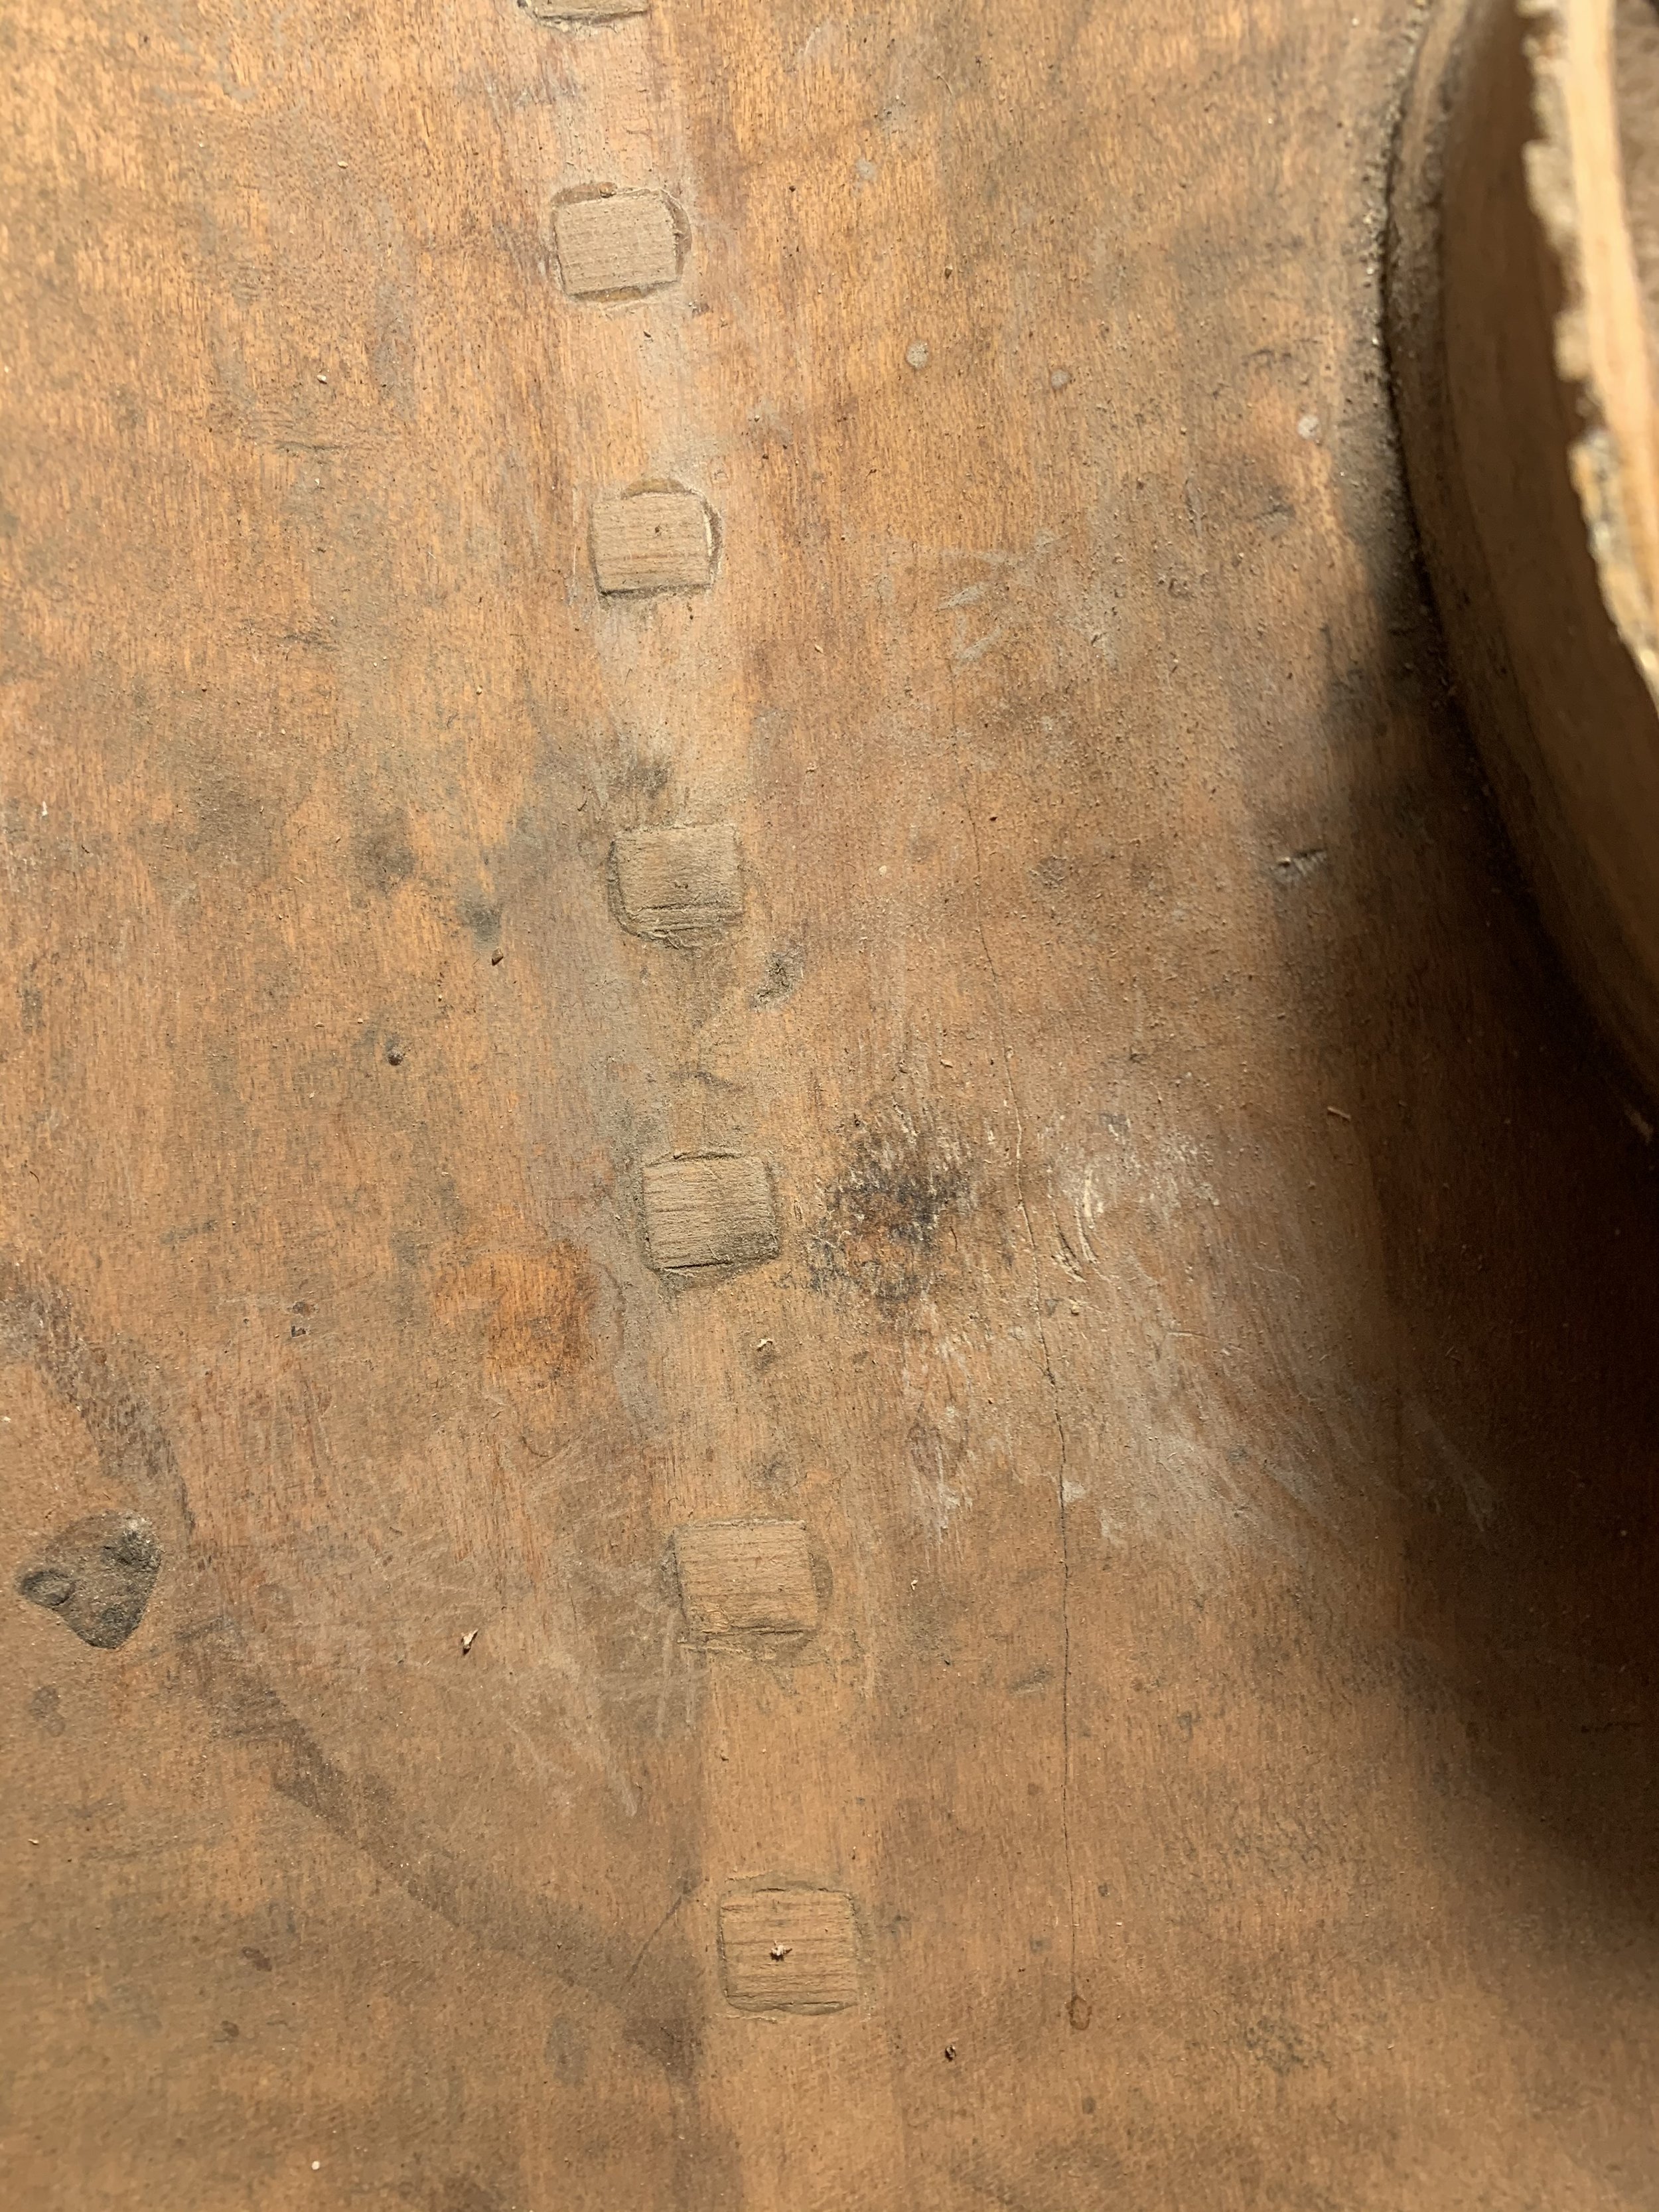
This photo above shows the little light-colored rectangles called “cleats,” which hold the cracks closed. They are shaped pieces of wood that are glued onto the inside surface of the top, spanning the crack, and adding stability to the repaired area.

Here is the start of the repair to the wing crack, and shows a strip of wood sawed out where the old crack was. The old crack was so old, had been re-broken and re-glued so many times over the centuries, that there was no longer much wood left once all the old glue was cleaned out. To make a perfect glueing surface that would result in a solid joint, the old mangled wood was removed in a perfect straight line right along two grain-lines in the wood, and then a new strip of wood fitted into the gap, resulting in a perfect solid glueing surface.

This shows the interior “patch” that is stabilizing the crack at the wing. Very careful stabilization of the repaired area was required so that the violin could be played for another hundred years without breaking again. You can see the half-circle of wood that was removed and then new lighter colored wood glued in. You can also see the very thin strip of light colored wood that filled the gap in the last picture to provide that perfect joint. The new wood is lighter colored because it lacks the patina of time. It will darken.
Once the top of the violin is fully repaired, all the cracks glued and reinforced, it is glued back onto the body of the violin with special clamps. The next step is to restore the varnish. The cracks effected not only the wood but also the varnish, so these cracks were filled with new varnish to make the line of the repair “disappear.” The places where the varnish was worn away were restored with new varnish to protect and cover the wood. Scratches, bumps and accidents that result from using the instrument, no matter how carefully a player treats the instrument, are filled and color-matched to make them “disappear” as well, resulting in an instrument that looks its best, rather than looking bedraggled. I try to find balance between making an instrument look more“new” than it should, and leaving it looking “beat-up.” An old violin, in my opinion, should carry the signs and patina of a well-loved and much-played tool for making music, but with the healthy and gracefully-aged preservation of a fine antique. I tried to restore the look of the violin to a fine, healthy and wise age of two and a half centuries.
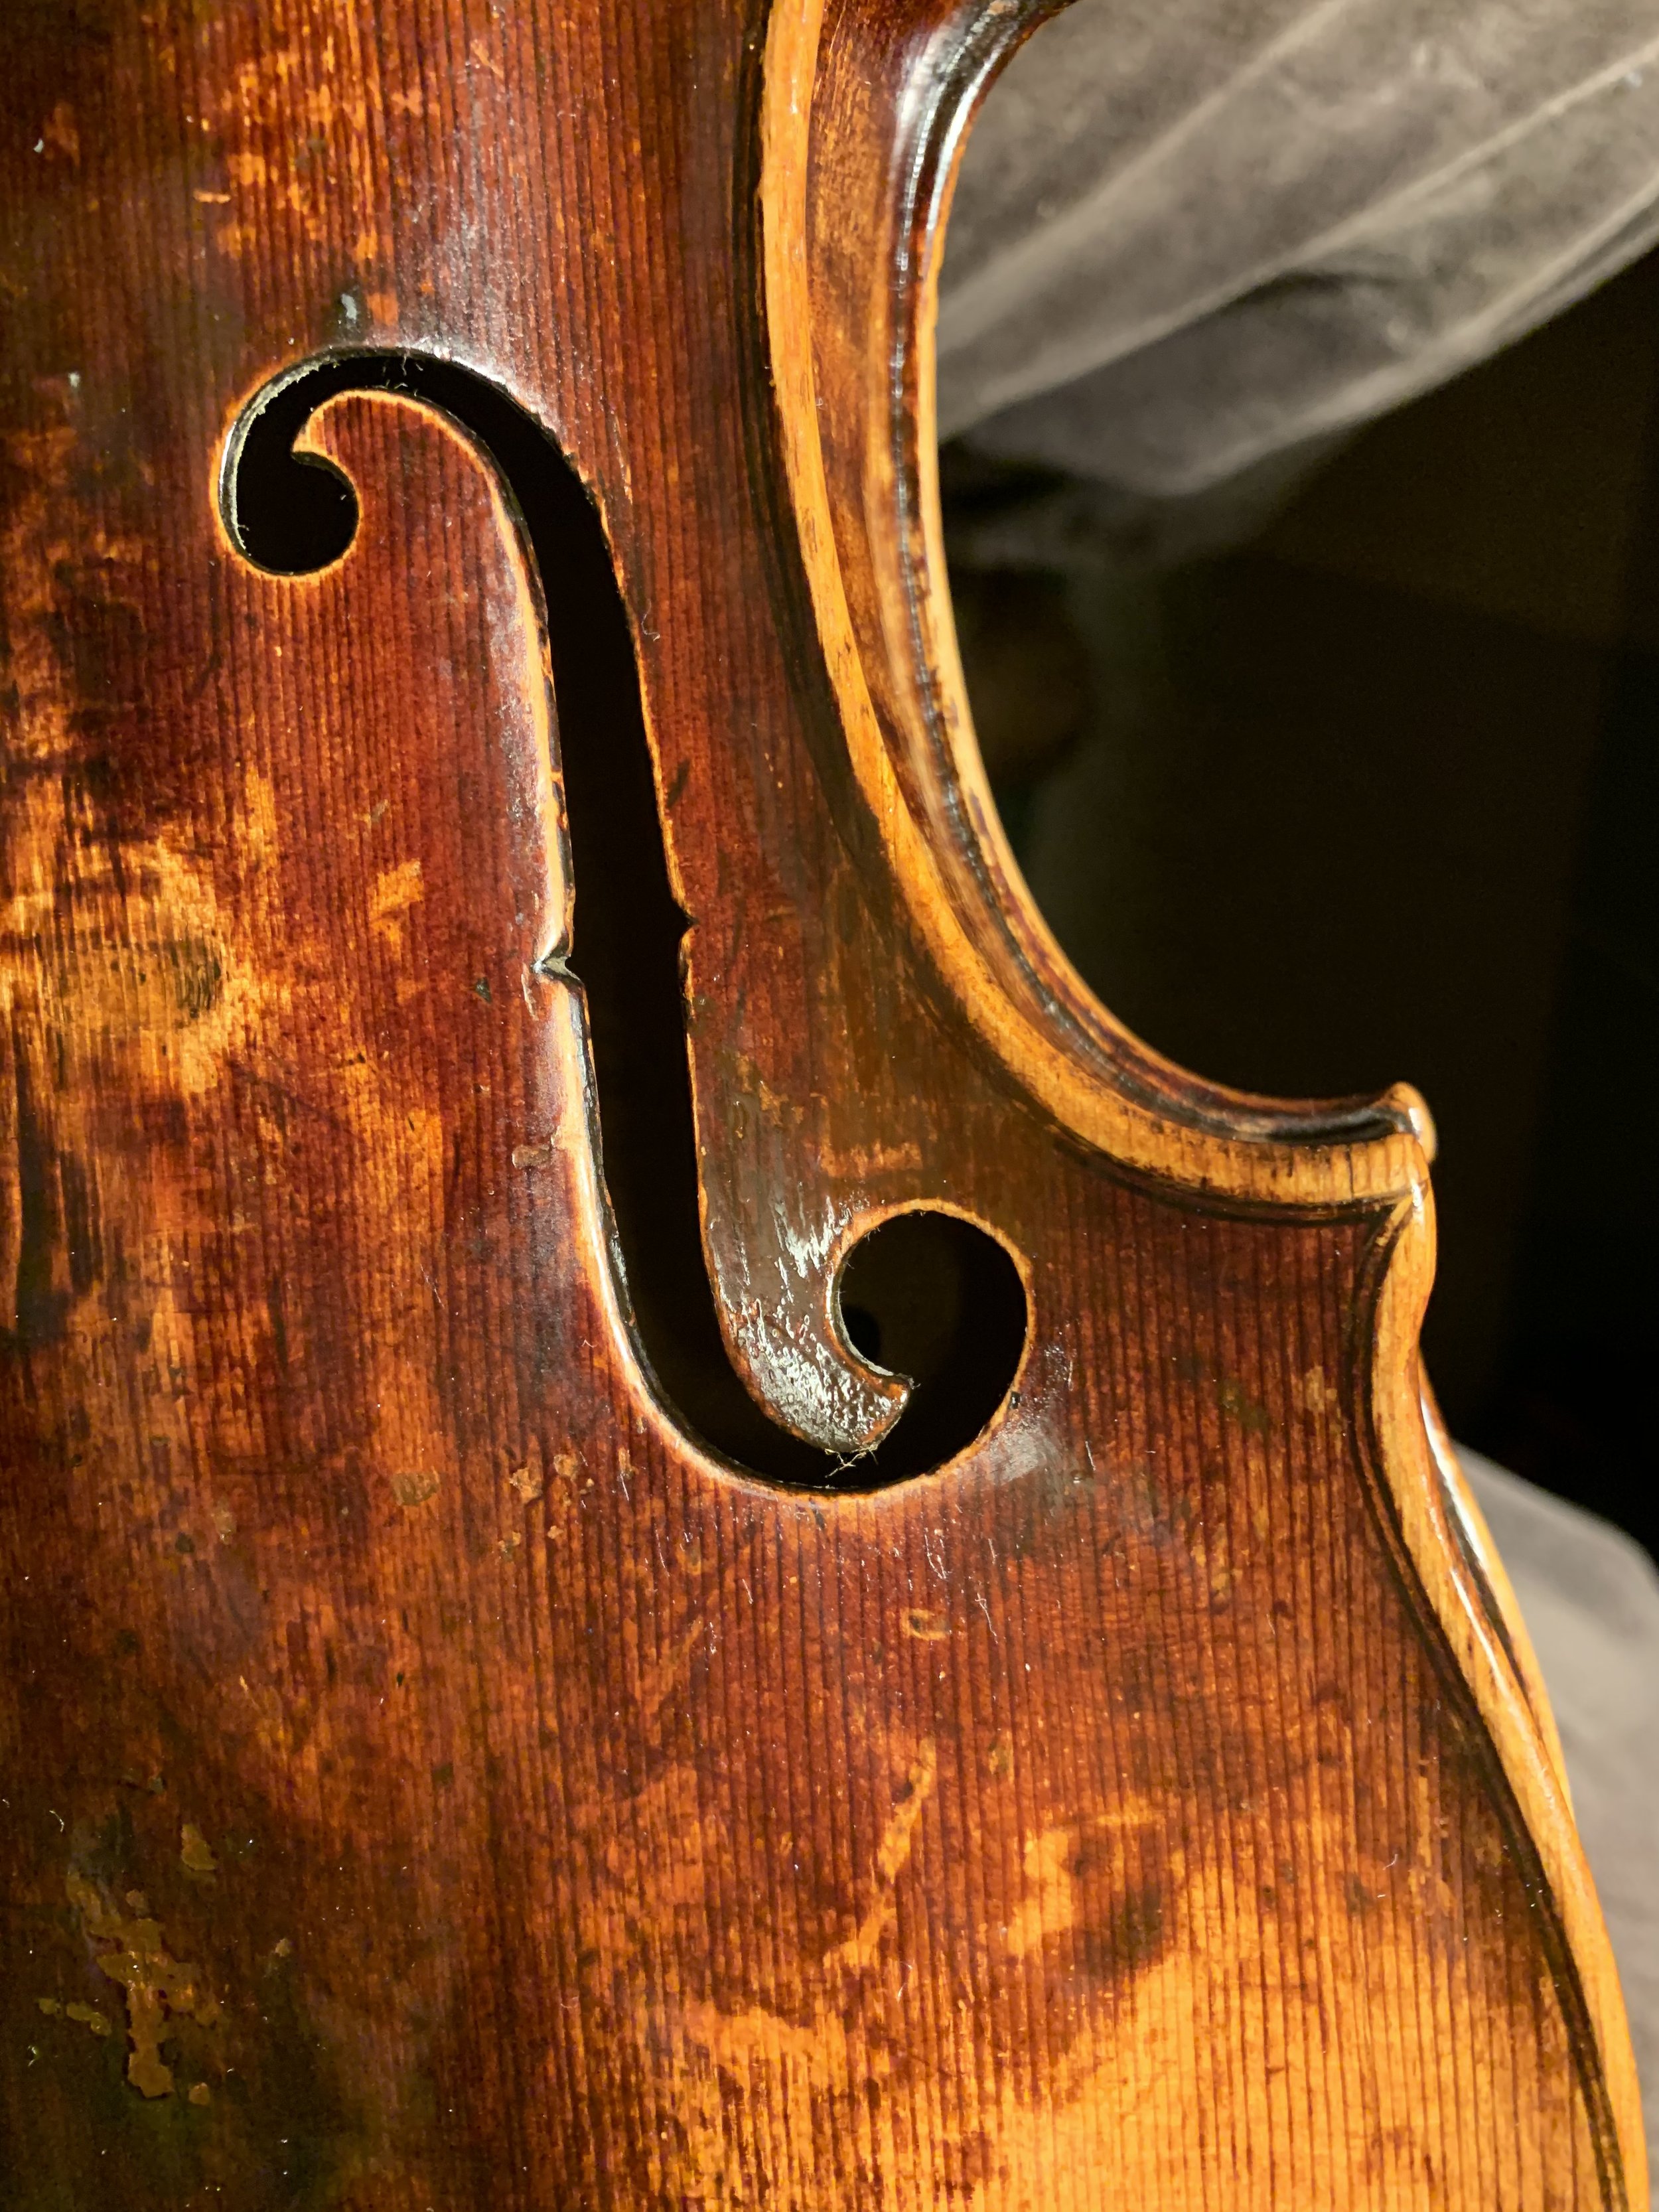
The final result of the repair and restoration of the wing crack.

The above image shows the violin, fully restored and ready to be set up with bridge, pegs and strings.

A properly cut and fit bridge is elegant and structurally cohesive, for optimal sound quality and easy and comfortable playability. Every violin should have an expert set-up to sound its best.
Lastly, a careful set-up is crucial to an instrument sounding its best. A poorly fit soundpost or a clumsy bridge can completely ruin the sound quality. It is imperative that the set-up be top-notch.